How to send an SMS message from our Raspberry Pi?
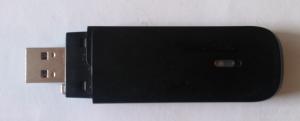
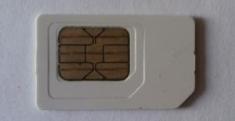
We need a modem and, of course, a SIM card:
To be able to send an SMS message using the method described below, our modem must have a traditional interface. If we use a HiLink modem, we are doomed to clicking the mouse in the web browser.
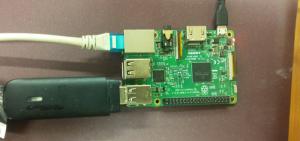
We plug our modem into the Raspberry Pi USB port, and after a few seconds, in the /dev location, we will see a new USB device and new serial ports:
root@mobile3:~# lsusb
Bus 001 Device 005: ID 046d:081b Logitech, Inc. Webcam C310
Bus 001 Device 007: ID 0e8d:00a5 MediaTek Inc.
Bus 001 Device 003: ID 0424:ec00 Standard Microsystems Corp. SMSC9512/9514 Fast Ethernet Adapter
Bus 001 Device 002: ID 0424:9514 Standard Microsystems Corp.
Bus 001 Device 001: ID 1d6b:0002 Linux Foundation 2.0 root hub


root@mobile3:~# ls /dev
autofs           loop4               ram12    tty0   tty32  tty56      vc-mem
.
.
fuse             net                 sda      tty22  tty46  ttyUSB0    vcsa6
gpiomem          network_latency     serial   tty23  tty47  ttyUSB1   vcsa7
hwrng            network_throughput  serial0  tty24  tty48  ttyUSB2    vcsm
initctl          null                serial1  tty25  tty49  ttyUSB3    vhci
.
.
There may be fewer ttyUSB ports, depending on the modem model, but we are interested only in ttyUSB0 (unless we already had some ttyUSB ports before connecting the modem, then we choose first of those newly appeared).
If the lsusb command shows a new device, but there are no new serial devices in the /dev location, then either our Raspbian does not recognize this hardware, or it is a HiLink modem.
In the second case, we can try to switch it to the traditional mode, using some advice on various internet forums, although it will rather be a waste of time, and we may accidentally destroy the modem.
In the first case, if our Raspbian does not recognize this hardware, we are most likely missing the USB-modeswitch package. Install it using the following command: apt-get install usb-modeswitch usb-modeswitch-data and try again.
If it still does not work, then you need to investigate what rules describing our modem are missing in the /usr/share/usb_modeswitch directory.
But we are supposed to write about sending SMS messages, so let's return to this topic and leave the investigation thread for another time.
So now, our station for sending SMS messages is ready:
First, let's check if our modem wants to cooperate with us.
Run minicom -D /dev/ttyUSB0 and write AT <enter>. The modem should answer OK.
We can also try other Hayes AT commands. We can even send an SMS message 'manually'.
If we see on the screen something similar to this, then the program that will discuss shortly will be able to talk with the modem and send SMS messages:
Welcome to minicom 2.7

OPTIONS: I18n
Compiled on Jan 12 2014, 05:42:53.
Port /dev/ttyUSB0, 10:47:58

Press CTRL-A Z for help on special keys

at
OK
at+cgmi
+CGMI: MTK1
And now, the software. As usual, an example program and a simple compilation script. Download it, compile it, run it:
./sendsms telephone_number messageThe given telephone number has to include the country code, e.g. +48605223344.
The SMS message will be sent, and in the /var/log/sms.log file you will find an entry containing the message details (message content, timestamp, and the destination number).
2018-05-23 15:00:   Inebriated employee JAN SEBASTIAN BACH,

blood alcohol content: 0.1 | Status (+48605223344):  +CMGS: 1 OK
If you are not interested in how this program works, you can stop reading here.
The program sends to the modem a standard AT command sequence, nothing particularly interesting, but after each command, it has to wait for the modem to respond and not hang or crash if it does not get it.
It must also program the serial port in advance. And this is an interesting part.
Unix, and therefore Linux in a way, is almost 60 years old. At the time of its inception, computers and their interfaces were quite different.
What now seems to be the only solution, so obvious that it does not occur to us that it might be otherwise, in those archaic times in the timescale of computer science, was not at all obvious.
For example, a byte. 8 bits. So a beautiful and simple idea for a computer scientist. The power of number 2. And it is easy to write it in hexadecimal!
However, in those days, when a computer processor based on single transistors (often germanium) weighed a ton, memory (for example, ferrite) had a capacity counted in kilobytes, every bit cost a huge amount of money!
Let's have a closer look at the ferrite memory in enlargement. Each of these ferrite beads had a diameter of about 1 millimeter. Three wires were threaded through every bead (by hand!). For each wire, there was a control circuit based on germanium transistors. It remembered 1 bit. How much could hardware supporting one bit cost?
The word as we use now (4, 8, 16, 32, etc. bits), became popular in the 1970s with the advent of the first microprocessors. Previously, every computer manufacturer used his own word length (22, 50, 27, 48 ...).
Character encoding was also a result of the computer constructor's decision. Not only there was no UNICODE, which may not be surprising, after all, there is also ISO, cp1250, etc., but even ASCII, which you have certainly heard about, did not use 8 bits, but 7. The IBM EBCDIC was an eight-bit code, but the character codes in EBCDIC were different from those in ASCII.
Unix was created in such environment. We can still see it if we look at some of its old components, for example, the serial port support. It seems impossible that concepts developed 50 years ago could fit modern solutions without problems. And yet, those designed for the serial port (7 or 8-bit character, different speed of incoming and outgoing transmission, conversion of transmitted characters, etc.) perfectly support USB ports, GSM modems!
So, now about the SMS message program functionality.
The full source code is available in a file linked earlier in this post. We will discuss here only the parts of the code that are essential for program understanding.
First, we open the log file in which we will save the information about sent text messages. We enter the current time, destination phone number, and the SMS message content. We open the log file in the "a" mode, everything will be added to its end, without destroying the existing content.
fp=fopen("/var/log/sms.log", "a");
time (&czas);
loctime = localtime (&czas);
strftime (data, 50, "%Y-%m-%d %H:%M: ", loctime);
fprintf(fp, "%s %s ", data, argv[1]); fflush(0);
fprintf(fp, "%s ", argv[2]); fflush(0);
Now, we open the serial port to which the modem is connected. We do not want any other process to interact with our modem at the time of sending the SMS message, so we forbid other processes to use this serial port.
For this purpose, we initialize the fl struct:
fl.l_type   = F_WRLCK;  /* F_RDLCK, F_WRLCK, F_UNLCK    */
fl.l_whence = SEEK_SET; /* SEEK_SET, SEEK_CUR, SEEK_END */
fl.l_start  = 0;        /* Offset from l_whence         */
fl.l_len    = 0;        /* length, 0 = to EOF           */
fl.l_pid    = getpid(); /* our PID                      */
We open our serial port and set the flags NOCTTY (do not create a controlling terminal), RDWR (read and write), NONBLOCK (do not wait for an incoming character, if there is nothing to read, return an error immediately).
The O_NOCTTY flag matters, although not on all Unix systems, when opening terminal devices. It is recommended to set it. For its full description, see the glibc documentation.
if ((fd2 = open ("/dev/ttyUSB0",
                   O_NOCTTY | O_RDWR | O_NONBLOCK)) != -1)
 {
We immediately put the lock on our open file. Until its removal or completion of our process, no one else will have access to our port.
fcntl(fd2,F_SETLKW,&fl); // set lock, czekaj, jesli ktos inny to zrobil
Now we have to program our serial port. Let's think back to what we said about Linux. Serial port programming is not only about setting the speed, a number of stop bits, and transmission control method. Our serial port settings will be, for example, as follows:
root@mobile3:/home/rcp# stty -a -F /dev/ttyUSB0
speed 9600 baud; rows 0; columns 0; line = 0;
intr = ^C; quit = ^\; erase = ^?; kill = ^U; eof = ^D; eol = <undef>; eol2 = <undef>;
swtch = <undef>; start = ^Q; stop = ^S; susp = ^Z; rprnt = ^R; werase = ^W;
lnext = ^V; flush = ^O; min = 1; time = 5;
-parenb -parodd -cmspar cs8 -hupcl -cstopb cread clocal -crtscts
ignbrk -brkint -ignpar -parmrk -inpck -istrip -inlcr -igncr -icrnl -ixon -ixoff
-iuclc -ixany -imaxbel -iutf8
-opost -olcuc -ocrnl -onlcr -onocr -onlret -ofill -ofdel nl0 cr0 tab0 bs0 vt0 ff0
-isig -icanon -iexten -echo -echoe -echok -echonl -noflsh -xcase -tostop -echoprt
-echoctl -echoke
Our serial port driver is kind of a part of the text terminal software connected to it, it can replace control characters (eg CR and LF), stop the transmission, produce a local echo of sent characters. We do not need it and we have to turn off some of these options, for example, replacing CR with LF.
So let's program the serial port. We read the existing settings (tcgetattr), set the speed (cfsetspeed), set the flags, and program the port (tcgetattr):
  tcgetattr (fd2, &opcje);
  predkosc = B4800;
  cfsetspeed (&opcje, predkosc);
  opcje.c_lflag &= ~(ICANON | ECHO | ECHOE | ISIG);
  opcje.c_cflag &= ~PARENB;
  opcje.c_cflag &= ~PARODD;
  opcje.c_cflag &= ~CSTOPB;
  opcje.c_cflag &= ~CSIZE;
  opcje.c_cflag |= CS8;
  opcje.c_cflag &= ~CRTSCTS;
  opcje.c_iflag &= ~IXON;
  opcje.c_iflag &= ~IXOFF;
  opcje.c_iflag &= ~INLCR;
  opcje.c_iflag &= ~ICRNL;
  opcje.c_oflag &= ~ONLCR;
  opcje.c_oflag &= ~OCRNL;
  tcsetattr (fd2, TCSANOW, &opcje);
Now, the serial port is done, we can send the SMS messages.
We program the modem. Factory reset, turn on displaying the modem responses, turn on dispalying the command echo (it will be useful when starting the program). After each command is sent, we wait for the modem's response (checkok()):
       write (fd2, "AT&f\r", 5);
       checkok();
       write (fd2, "ATq0\r", 5);
       checkok();
       write (fd2, "ATe1\r", 5);
       checkok();
We switch the modem to sending the SMS messages in text mode. An alternative is to send the SMS message in PDU mode, but we would have to make an encoded binary block from our SMS message content and phone number. Maybe someday I will show my program that does this, but for now, we will stay with the simpler text mode.
       write (fd2, "AT+CMGF=1\r", 10);
       checkok();
Now, we send the SMS message. First, the AT+CMGS=telephone_number command, CR, then the content, and CTRL+Z. So, the following command:
write (fd2, "AT+CMGS=", 8);
The telephone number with the country code prefix, e.g. +48223344:
       sprintf(buf, "\"%s\"\r", argv[1]);
       write (fd2, buf , strlen(buf));
Now the modem waits for the content of the SMS message, displays the > character, which will be found by the checkprompt() procedure:
checkprompt();
Before we send our SMS message, we need to make sure that it contains only ASCII table characters. Sending something else may hang the modem so badly, that only disconnecting it from the USB port and connecting it back will help.
It is possible to sent UTF-encoded text, but I do not know how. I did not find the proper documentation and my experiments failed.
We recode all special national language characters to English ASCII characters. If we find some other illegal code, we replace it with a space. In the source code provided, I made only Polish alphabet characters conversion and I must say that it is a terribly clunky job, but it is simple and effective.
We will rewrite each character from the argv[2] string to buf, replacing the illegal characters with ASCII:
       j=0;
       for (i=0; i< strlen(argv[2]); i++)
       {
         znak=argv[2][i];
        if (znak < 0x80)
          {buf[j]=znak; j++;}
        else
         {
          i++;
          znak1=argv[2][i];
          if (znak == 0xc3)
             switch (znak1)
              {
               case (0x93): { znak='O';buf[j]=znak; j++;;
                          break; }// O ogonek
               case (0xb3): { znak='o';buf[j]=znak; j++;;
                          break; }// o ogonek
              }
          if (znak == 0xc4)
             switch (znak1)
              {
               case (0x84): { znak='A';buf[j]=znak; j++;;
                          break; }// A ogonek
               case (0x86): { znak='C';buf[j]=znak; j++;;
                          break; }// C ogonek
               case (0x98): { znak='E';buf[j]=znak; j++;;
                          break; }// E ogonek
               case (0x85): { znak='a';buf[j]=znak; j++;;
                          break; }// a ogonek
               case (0x87): { znak='c';buf[j]=znak; j++;;
                          break; }// c ogonek
               case (0x99): { znak='e';buf[j]=znak; j++;;
                          break; }// e ogonek
              }
          if (znak == 0xc5)
             switch (znak1)
              {
               case (0x81): { znak='L';buf[j]=znak; j++;;
                          break; }// L ogonek
               case (0x83): { znak='N';buf[j]=znak; j++;;
                          break; }// N ogonek
               case (0x9a): { znak='S';buf[j]=znak; j++;;
                          break; }// S ogonek
               case (0xb9): { znak='Z';buf[j]=znak; j++;;
                          break; }// Z kreska
               case (0xbb): { znak='Z';buf[j]=znak; j++;;
                          break; }// Z kropka
               case (0x82): { znak='l';buf[j]=znak; j++;;
                          break; }// l ogonek
               case (0x84): { znak='n';buf[j]=znak; j++;;
                          break; }// n ogonek
               case (0x9b): { znak='s';buf[j]=znak; j++;;
                          break; }// s ogonek
               case (0xba): { znak='z';buf[j]=znak; j++;;
                          break; }// z kreska
               case (0xbc): { znak='z';buf[j]=znak; j++;;
                          break; }// z kropka
              }
          if (znak > 0x7f) {buf[j] = ' '; i--; j++;}  // nieprawidlowy krzaczek

         }
       }
       buf[j]=0x00;
We send our recoded text to the modem, followed by the 1A character in hexadecimal (CTRL+Z), wait for the modem to answer what it did with our SMS message, close the serial port that we opened at the beginning (the lock will be removed), close the log file and finish the operation:
       write (fd2, buf , strlen(buf));
       write (fd2, "\x1a", 1);
       checkresp();
    close(fd2);
 } //od open fd
fclose(fp);
} //od main
I think that the checkok() and checkprompt() functions do not require explanation, however, there is something worth mentioning about the checkresp(). It receives the modem response, that tells us what happened to our SMS message, and writes this information into the log file.
After sending the SMS message, the modem replies with something similar to this:
+CMGS: 200

OK
Each log entry has three lines. The first one contains the sequence number of the sent SMS message, the second is empty, the third shows the result. Unfortunately, these messages may slightly differ depending on the modem model. If it failed to send the SMS message, then there will be no second and third lines.
In general, we receive three lines, ending with a timeout in case of fail, and save it to the sent SMS messages log file.
The log file entry will look similar to this:
2018-07-09 16:49: +48605223344 test | Status: +CMGS: 202 OK
We will not show here the sources of the checkok(), checkprompt(), or checkresp() functions, they can be found in the program's source code.
There is nothing interesting to discuss there.
Maybe someday I will show a slightly more complicated program for sending SMS messages, the SMS server that receives a telephone number and SMS content over the network, a bit similar to the already described camera server.


 Polski

